Whether you love it or hate it, snow is an inevitable part of winter in Kansas. In view of that fact, it might help your mental outlook to view snow as Vermont farmer Wilson Bentley did in the late 1800s, and see the beauty in each individual snowflake.
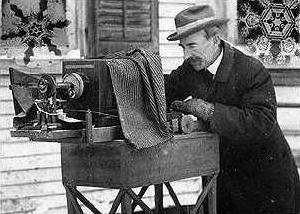
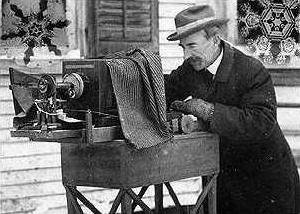
Describing snowflakes as “tiny miracles of beauty”, Bentley made photographing snowflakes and recording meteorological information his life’s work. In January 1885 Bentley photographed the first individual snow crystal using a bellows camera with an attached microscope. He collected snowflakes during frequent New England snow storms, quickly transferring them to a cold room in his farmhouse where he had his equipment set up. For 46 years, Bentley photographed snowflakes, producing 5,381 photos in which not one snowflake was alike.
A true “citizen” scientist, Bentley made many discoveries about snow crystal formation and the nature of water, which weren’t recognized until well after his death. At the encouragement of a University of Vermont professor, he published many of his findings and ideas. Among other important observations, he noted “a single ice crystal reflected the changes in the temperature of the air through which the crystal fell on its journey to the ground”.
Snowflakes begin as microscopic water droplets – water vapor – that condense (changes from a gas or vapor to a liquid) as the air cools. The water droplets attach to dust particles, beginning the crystallization process. Due to the attractive property of water, more water droplets attach to the original one, arranging themselves in a six-sided hexagonal shapes with the corners bending upward, forming a crystal lattice. The attraction is due to partially negatively charged oxygen atoms bonding with partially positively charged hydrogen atoms that make up water – H2O. As the snow crystals move about in the clouds, they bump into one another, sticking together to form snowflakes. They also move through different temperature regions, adding more crystals.
One snowflake may contain more than 50 individual ice crystals. The largest snowflake on record, reported at Fort Keogh, Montana, Jan. 28, 1887, was 15 inches wide and 8 inches thick.
You can observe the process by making a simple diffusion chamber with household materials. Go to the website: www.its.caltech.edu/~atomic/snowcrystals/project/project.htm for instructions. At KWEC, we’ve grown fishbone and dendrite ice crystals using this method. Scientists use larger diffusion chambers to study ice crystal formation.
As Bentley noted, snow crystals take on specific shapes at specific temperatures. At 32 to 25 degrees F, thin hexagonal plates form, with needles forming at 25 to 21 degrees F. The lacy, complex snow crystals form at low temperatures of 10 to 3 degrees F. There are seven principal types of snow crystals, with at least 35 named snow crystal types.
And as to that age-old question “are any two snowflakes alike?” – It depends. On a molecular level, no two are exactly alike but two snowflakes could look exactly alike. Due to constantly changing conditions snowflake structure constantly changes, making the chance of finding duplicate snowflakes highly improbable.
So instead of dreading snow, embrace it and take the time to appreciate its beauty and complex structure. Then you can curse the snow for interfering with your plans and making driving a challenge.
Make an ice candle
If it’s going to be cold, why not use the low temperatures to make some ice candles. I once made 20 ice candles and lined the drive with them, illuminating the area with the warm glow of candlelight sparkling through ice.
Materials
1 gallon ice cream buckets or plastic container of similar size
Tin can filled with sand or rocks
Water
Tealight or votive candles
Fill the plastic container two-thirds full of water or as high as the tin can is tall. Place weighted tin can in middle of container and place outside in below freezing temperatures or in your freezer. If you have the time to spend checking the ice to see how long it takes to partially freeze the water, you can skip the tin can and just dump out the ice when it is all frozen except the middle. The middle part will break and the water pour out, leaving a natural cavity for the candle. If using the tin can, run warm water on outside of the container to loosen ice so it will slip out of the mold, then empty sand or rocks from can and pour hot water in the can to loosen it from the ice, pour out and remove can. Store ice candles outside in the shade or in freezer; place them on a safe surface, add the candle and light.
Wetland Explorer
Embrace the snow


